A floor pump that will not hold pressure usually has an air leak at the pump head, hose, valve connection, or internal seals. Check those areas in order before replacing the pump.
A floor pump that is not holding pressure usually has an air leak rather than a problem with the tire. Start by checking the pump head’s seal and valve setting, then inspect the hose, connections, and pump seals. If the pump handle rises or falls on its own while connected, air is escaping somewhere in the pump or valve connection.
Check the pump head first
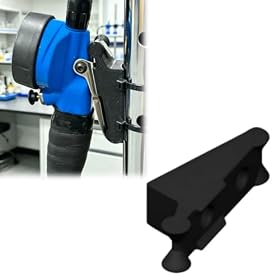
The pump head is the most common source of pressure loss. Remove it from the tire, inspect the rubber sealing surfaces for dirt or damage, and reconnect it carefully.
Confirm that the head is set for the valve on your wheel. Presta and Schrader valves may use different openings or a reversible seal.
Push the head fully onto the valve before locking the lever.
Keep the head straight while pumping. A tilted head can leak even when the lever is locked.
If the head has a selector or reversible insert, verify that the insert is installed in the correct orientation.
Listen for hissing around the head while pumping.
Do not overtighten a threaded valve connection or force a lever that does not move normally. A damaged valve stem can also leak and may be mistaken for a faulty pump head.
Inspect the hose and fittings
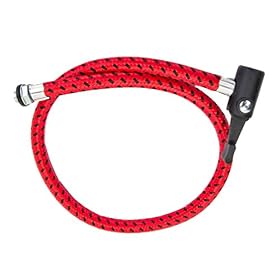
Examine the entire hose for cracks, cuts, soft spots, or a section that bulges when you pump. Check both ends where the hose attaches to the pump body and the head.
With the pump disconnected from the tire, briefly operate the pump and listen around each fitting. A leak at a threaded connection may be corrected by carefully tightening it according to the manufacturer’s instructions. If the hose is cracked or the fitting remains loose, replace the hose or head if a compatible replacement is available.
Do not seal a damaged high-pressure hose with tape. It can fail unexpectedly and may not be safe to use.
Product prices and availability are accurate as of the date/time indicated and are subject to change. Any price and availability information displayed on Amazon.com at the time of purchase will apply to the purchase of this product.
Check the tire valve and setup
The pump may be working correctly while the tire valve is allowing air to escape.
Presta valves
Make sure the small valve nut is loosened before attaching the pump. After removing the pump, tighten the nut gently. A bent or damaged Presta valve core can leak, and some valve extenders require a particular connection method.
Schrader valves
Inspect the spring-loaded valve pin and the threaded area. Dirt or damage can prevent the pump head from sealing. Avoid pressing the pin with a sharp object.
If the tire loses pressure immediately after removing the pump, apply a small amount of soapy water around the valve and look for bubbles. Replace or repair the valve or tube if it is leaking. Follow the tire, tube, and valve manufacturer’s guidance before inflating beyond the recommended pressure.
Product prices and availability are accurate as of the date/time indicated and are subject to change. Any price and availability information displayed on Amazon.com at the time of purchase will apply to the purchase of this product.
Look for a leaking pump seal
If the pump head and hose appear sound, the internal piston seal may be worn or dry. Signs can include:
The handle moves with unusually little resistance.
Air escapes around the pump barrel or piston shaft.
The pump loses pressure even when the hose is capped or connected to a known-good valve.
Pumping becomes uneven or the handle slips back after each stroke.
Some pumps have a replaceable piston seal or service kit. Use only parts specified for that pump and follow the manufacturer’s service instructions. Do not disassemble a pump if doing so could release a pressurized chamber or void a safety feature.
A light lubricant may be appropriate for some pump seals, but only use the lubricant and amount recommended by the manufacturer. The wrong lubricant can damage rubber components.
Check the gauge separately
A gauge that drops to zero or gives inconsistent readings does not always mean the pump is losing air. The gauge may be inaccurate or its connection may be leaking.
Compare the reading with a separate gauge on the same tire, using the same valve and connection conditions. If the tire feels and measures correctly but the floor-pump gauge is clearly wrong, a replaceable gauge may be the simplest repair. Do not rely on a questionable gauge when inflating tires near their maximum recommended pressure.
Make sure the pump is being used within its limits
A floor pump can seem unable to hold pressure when it is being used incorrectly or beyond its intended range. Check that:
The pump is designed for the tire pressure you need.
The hose and head are compatible with the valve type.
The pump is standing securely and the handle is moving through its full stroke.
The tire is not already damaged or unseated from the rim.
You are reading the gauge only after the pump head is properly sealed.
For a tubeless tire, seating the bead may require a pump or inflation method designed for that task. Stop if the tire, rim, or valve shows damage, and follow the component manufacturer’s inflation instructions.
When to replace the pump
Replace the pump when the barrel, hose, head, or internal seal is damaged and a compatible replacement part is unavailable or costs nearly as much as a suitable new pump. Replacement is also reasonable if the gauge is unreliable, the pump is difficult to operate, or the pump cannot safely reach the pressure required by your tires.
A new pump should match your valve types, required pressure range, gauge preference, and storage needs. A floor pump with a secure dual-valve or switchable head is convenient for multiple bikes, while a simple single-valve head can reduce setup mistakes.
Quick diagnosis checklist
Remove and reconnect the pump head squarely.
Confirm the head setting matches the valve type.
Inspect the head seal, hose, and hose fittings.
Check the tire valve for leaks with soapy water.
Compare the built-in gauge with a separate gauge.
Inspect the piston area for air escaping around the barrel or shaft.
Replace the leaking part if available; otherwise replace the pump.
Disconnect the pump before inspecting or repairing it, and never exceed the pressure marked on the tire or specified by the rim and tire manufacturers.
FAQ
Why does my floor pump lose pressure when I remove it from the valve?
A small amount of air can escape from the connection during removal, but a noticeable or continuous loss usually indicates that the pump head is not sealing correctly, the valve is damaged, or the tire valve core is leaking. Check the head seal and the valve with soapy water.
Why does my floor pump handle come back up by itself?
The piston seal or another internal seal may be allowing air to pass around the piston. First check the hose and pump head for leaks. If air is escaping from the barrel or piston shaft, inspect the manufacturer’s service options or replace the pump.
Can I repair a leaking floor pump hose?
A cracked or damaged hose should generally be replaced rather than patched. Check whether the manufacturer offers a compatible hose or pump-head assembly, and follow the pump’s service instructions.
How can I tell whether the pump gauge is wrong?
Inflate the same tire and compare the floor-pump reading with a separate, known-good gauge. If the readings differ substantially while the tire itself is not losing air, the built-in gauge may need replacement or the pump may be due for replacement.