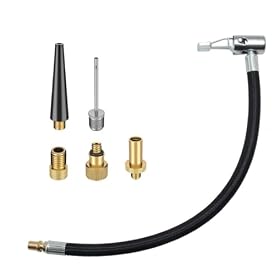
A replacement gauge can restore a floor pump without replacing the entire pump, but compatibility matters. Check the gauge thread, pressure range, hose connection, and mounting method before ordering.
Replacement gauge for a floor pump
A replacement gauge can fix a bike floor pump when the gauge is cracked, stuck, fogged, or reading inaccurately. Before buying, confirm that the replacement matches your pump’s gauge thread, hose connection, mounting style, and pressure range. If the gauge is permanently molded into the pump body or the pump has other damage, replacing the entire pump may be more practical.
Check whether the gauge is actually replaceable
Inspect the area where the gauge connects to the pump body. A replaceable gauge usually has a threaded connection, retaining nut, or removable fitting. Some floor pumps use a gauge that is integrated into the base or cylinder and cannot be changed without replacing a larger assembly.
Look for:
A threaded gauge body or retaining nut
A separate hose fitting near the gauge
Screws or a removable bezel holding the gauge in place
A pump manufacturer’s replacement-parts listing
A model number printed on the pump, base, barrel, or handle
Do not force the gauge loose. The connection may use a seal, washer, or thread sealant, and damaging the pump body can create a leak that is harder to repair.
Match the gauge connection
The most important specification is the connection between the gauge and the pump. A gauge can look physically similar but still fail to seal if its thread or fitting is different.
Check these points before ordering:
Gauge thread and diameter
Measure the old gauge only after removing it, if the manufacturer allows removal. Compare the thread type, diameter, and pitch with the replacement listing. Product descriptions may identify the connection by a thread standard, but not all listings use the same terminology.
If you cannot identify the thread, search using the exact pump model and “replacement gauge,” then confirm compatibility with the manufacturer or seller.
Hose-side fitting
On some pumps, the gauge is connected directly to the pump body. On others, the gauge assembly includes a hose fitting, adapter, or short section of tubing. A replacement gauge that fits the pump body may still be incompatible with the existing hose.
Check whether the replacement includes:
The gauge only
A gauge and hose fitting
A complete gauge assembly
Seals, washers, or adapters
Do not assume that an adapter will solve every mismatch. An incorrect adapter can leak or restrict airflow.
Mounting style
The replacement must fit the pump’s physical mounting arrangement. Compare the gauge diameter, mounting nut, bracket, and orientation. A gauge that has the correct thread but does not sit securely in the pump base may be difficult to read and vulnerable to impact.
Product prices and availability are accurate as of the date/time indicated and are subject to change. Any price and availability information displayed on Amazon.com at the time of purchase will apply to the purchase of this product.
Choose the right pressure range
The gauge’s maximum pressure should suit the tires you inflate, but a very high maximum reading is not automatically better. A gauge with a lower, appropriate range can make normal bike-tire pressures easier to read than a gauge designed for much higher pressures.
Consider:
The pressure range printed on the original gauge
The pressure range recommended on your tires
Whether you primarily inflate road, gravel, mountain, commuter, or cargo-bike tires
How clearly the gauge marks the pressure you use most often
Never inflate beyond the tire, rim, tube, or pump manufacturer’s stated limits. The pressure printed on a tire sidewall may be a limit or guideline rather than the correct pressure for every rider and wheel setup.
Product prices and availability are accurate as of the date/time indicated and are subject to change. Any price and availability information displayed on Amazon.com at the time of purchase will apply to the purchase of this product.
Analog or digital replacement gauge?
Analog gauges
Analog gauges are the usual direct replacement for a traditional floor pump. They do not need batteries and can remain attached to the pump. Choose one with clear markings and a needle that returns to zero when the pump is depressurized.
An analog gauge is a sensible choice when you want the simplest installation and the replacement matches the original assembly.
Digital gauges
Digital gauges can offer an easy-to-read display, but they may require batteries and can be less convenient if the pump’s mounting area was designed for an analog gauge. A digital replacement also needs enough clearance for its display, buttons, and battery compartment.
Do not buy a digital gauge solely because it displays more digits. The pump’s mechanical connection and the gauge’s accuracy at your normal tire pressure matter more than display precision.
Signs the gauge needs replacement
A damaged gauge is not the only possible cause of a bad reading. Replace or investigate it when:
The needle does not return to zero after disconnecting the pump
The lens is cracked or the dial is difficult to read
The needle jumps excessively while pumping
The reading remains inconsistent after checking for leaks
The gauge has visible impact damage or corrosion
The pressure reading disagrees substantially with a known-good separate gauge
A small difference between gauges does not always mean one is defective. Check them at the same valve, with the same hose connection, and as close together in time as possible.
Inspect the pump before ordering a gauge
A replacement gauge will not fix every floor-pump problem. Check the likely causes in this order:
Valve connection: Make sure the pump head is fully engaged with the Presta or Schrader valve and that its seal is not worn.
Hose and fittings: Look for cracks, loose connections, cuts, or a kinked hose.
Gauge seal: Inspect the gauge connection for a loose fitting or damaged washer.
Pump setup: Confirm that the pump head is set for the correct valve type and that any required adapter is installed correctly.
Cylinder and piston seal: If air escapes around the handle or the pump struggles to build pressure, the piston seal may be worn.
Gauge accuracy: Compare the reading with a known-good gauge at moderate pressure.
If the pump loses air around the hose or valve head, repair that leak before blaming the gauge. A leaking system can make the gauge appear inaccurate because pressure is not being held consistently.
Installing a replacement gauge
Follow the pump manufacturer’s instructions whenever they are available. General installation steps are:
Release all pressure and disconnect the pump from the tire.
Photograph the original gauge, hose, washers, and fittings before disassembly.
Remove the old gauge carefully using the correct hand tools if needed.
Keep track of seals, O-rings, washers, and retaining nuts.
Install the replacement without cross-threading it.
Tighten it firmly, but do not overtighten plastic pump parts or small threaded fittings.
Reconnect the hose and check that the gauge is secure and readable.
Pump a small amount of air and inspect every connection for leaks.
Compare the reading with a separate, reliable gauge if accuracy is important.
Do not use thread sealant unless the pump or gauge manufacturer specifies it. Some connections seal with an O-ring or washer rather than the threads, and sealant can interfere with proper assembly.
When replacing the whole pump makes more sense
A replacement gauge is usually worthwhile when the pump barrel, base, handle, hose, and pump head are still in good condition and a compatible gauge is readily available. Replace the complete pump instead when:
Several replacement parts would cost close to a new pump
The pump has never worked well for your tire type or required pressure
For a frequently used home pump, choose a complete replacement with a clear gauge and a head compatible with your valve type if individual parts are difficult to identify. For occasional roadside use, a separate mini pump or compact gauge may be more practical than repairing a damaged floor pump.
FAQ
Can any bike pump gauge replace the gauge on my floor pump?
No. The replacement must match the gauge connection, mounting method, hose fitting, seals, and usable pressure range. Check the pump model or compare the original gauge and fittings before ordering.
How do I know whether my floor pump gauge is inaccurate?
Check whether the needle returns to zero, then compare the reading with a known-good gauge at the same tire and valve connection. Also inspect the hose, pump head, and gauge fittings for leaks.
Is it worth replacing a floor pump gauge?
It is often worthwhile when the rest of the pump is in good condition and a compatible gauge is available. If the pump body, hose, head, or piston seal is also damaged, replacing the complete pump may be more economical.
Do replacement floor-pump gauges include seals and adapters?
Some are sold as gauge-only parts, while others include fittings, washers, O-rings, or adapters. Confirm the included parts before ordering and do not assume an adapter will match your pump.