The best floor pump for a mountain bike should move plenty of air at low to moderate pressures, seal reliably on Presta valves, and offer a readable gauge. Here is how to choose one for standard inflation, tubeless setup, and routine maintenance.
A good floor pump for a mountain bike should prioritize high air volume, a reliable Presta chuck, a stable base, and an easy-to-read gauge. Mountain bike tires generally need more air per stroke than narrow road tires, while tubeless setups can require a sudden burst of air during seating. A high-pressure road pump is not automatically the best choice.
What to look for in a mountain bike floor pump
High-volume barrel
Look for a pump designed to move a substantial amount of air per stroke. A high-volume barrel fills wide mountain bike tires faster and requires fewer strokes. This matters especially for plus-size tires, fat-bike tires, and tires set up with tubes.
A pump does not need an extreme maximum-pressure rating for most mountain bike use. A very high-pressure rating often reflects a narrower barrel optimized for road tires. For mountain bikes, useful air delivery and controlled inflation are usually more important than reaching the highest possible pressure.
A gauge that is readable at low pressures
Mountain bike tire pressures are often much lower than road-bike pressures. A gauge with clear markings near the low end is easier to use accurately than one where the relevant range is compressed near zero.
Digital and analog gauges can both work well. The important factors are readability, consistent operation, and a gauge position that can be viewed while pumping. If you frequently adjust pressure by only a few PSI, a clear low-pressure scale is particularly useful.
A secure Presta valve connection
Many mountain bikes use Presta valves, although some use Schrader valves. Choose a pump with a head that supports your valve type, or a head that can be configured without loose parts. The connection should lock onto the valve without bending the valve stem or releasing air when removed.
If your bike uses tubeless tires, avoid repeatedly tightening a chuck against a delicate valve core. Follow the pump and valve manufacturer's instructions, and hold the valve stem near the rim when attaching or removing the head.
A stable base and comfortable handle
A wide, rigid base helps prevent the pump from tipping while you inflate a tire. This is more important when working with a high-volume pump, because the handle can require substantial force as pressure rises.
The handle should be large enough for a firm two-handed grip and should not flex excessively. A long hose also makes it easier to reach either wheel without turning the bicycle upside down.
Tubeless-inflation capability, if needed
A standard floor pump may inflate a tubeless tire after the bead is already seated, but it may not deliver air quickly enough to seat a loose bead on the rim. If you install tubeless tires yourself, consider a pump with a dedicated air chamber or another manufacturer-approved tubeless inflation feature.
This feature is not essential if a compressor, air tank, or bike shop is available for initial bead seating. It can be useful for home setup, but it should not be confused with ordinary high-volume inflation. Check that the pump is specifically designed for tubeless seating and follow the rim and tire manufacturers' safety limits.
Best floor pump features by use case
For everyday tube inflation
Choose a high-volume pump with a readable low-pressure gauge and a dependable dual-valve or reversible head. A simple design is often preferable because there are fewer small parts to misplace or adjust.
For tubeless tire setup
Choose a pump that explicitly supports tubeless inflation if you want to seat beads without a compressor. A large air reservoir can provide a short, forceful release, but the pump may be heavier and more expensive than a basic floor pump.
For plus and fat-bike tires
Prioritize air volume and a long, durable hose. Very wide tires require more air, so a small high-pressure pump can become slow and tiring. Confirm that the pump's valve head works with the valves installed on your wheels.
For accurate pressure adjustments
Prioritize gauge readability and repeatable valve operation. A separate digital gauge can be useful when the built-in gauge is difficult to read at mountain-bike pressures, but it adds another item to carry and maintain.
Product prices and availability are accurate as of the date/time indicated and are subject to change. Any price and availability information displayed on Amazon.com at the time of purchase will apply to the purchase of this product.
Floor pump versus mini pump
A floor pump is the better primary pump for home maintenance. Its long handle and stable base make it faster and less tiring for seating a tire bead, replacing a tube, or adjusting pressure before a ride.
A mini pump is a backup for rides because it fits in a pack or attaches to the frame. It usually takes more strokes and can be harder to use at higher pressures. Many riders keep both: a high-volume floor pump at home and a compact pump or CO2 inflator on the bike.
CO2 inflators are fast and compact, but a cartridge contains a limited amount of air and is single-use. They are best treated as an emergency option rather than a replacement for a home floor pump.
Product prices and availability are accurate as of the date/time indicated and are subject to change. Any price and availability information displayed on Amazon.com at the time of purchase will apply to the purchase of this product.
How to choose the right pump
Check the valve type. Confirm whether your bike uses Presta or Schrader valves.
Estimate your tire volume. Wider tires benefit more from a high-volume barrel.
Check the gauge scale. Make sure your normal pressure range is easy to read.
Decide whether you need tubeless seating. If so, look for an explicit reservoir or tubeless-inflation function.
Inspect the hose and chuck design. A flexible, sufficiently long hose reduces stress on the valve.
Consider storage and portability. A heavier reservoir pump is useful at home but less convenient to move.
Compare replacement parts. A replaceable hose, chuck, gauge, or seal can extend the useful life of the pump.
Common mistakes to avoid
Choosing maximum PSI instead of air volume
A high maximum-pressure number does not tell you how quickly the pump fills a mountain bike tire. For most trail bikes, volume per stroke and low-pressure gauge visibility matter more.
Assuming every pump handles both valve types
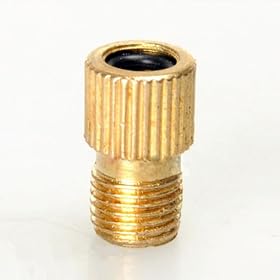
Some pump heads switch between valve types; others require an adapter or a reversible internal insert. Verify compatibility before buying, especially if you maintain multiple bikes.
Expecting a normal pump to seat every tubeless bead
A conventional floor pump may work with a cooperative tire and rim combination, but it may not provide enough initial airflow for every setup. Use a purpose-designed tubeless chamber, compressor, or qualified bike shop when necessary.
Ignoring the pressure recommendation
Inflate according to the tire, rim, tube or tubeless-system, and bicycle manufacturers' guidance. Do not exceed the lowest applicable pressure limit. Tire pressure also depends on rider weight, tire width, casing, terrain, and whether the system uses tubes.
When to replace a floor pump
Replace the pump when the gauge is unreliable, the head will not seal after replacing its serviceable seal, the hose is cracked, or the base and handle are damaged. If replacement parts are available and the barrel still operates smoothly, a new hose, chuck seal, or gauge may be more practical than replacing the entire pump.
Stop using a pump if its hose, barrel, or air chamber shows structural damage. For tubeless inflation, follow the manufacturer's inspection and pressure instructions; do not modify or pressurize an air reservoir beyond its stated limits.
FAQ
What type of floor pump is best for a mountain bike?
A high-volume floor pump with a stable base, readable low-pressure gauge, secure Presta-compatible chuck, and sufficiently long hose is the best general choice. Add a tubeless-inflation chamber if you need to seat beads at home.
Do mountain bikes need a high-pressure floor pump?
Usually, no. Most mountain bikes benefit more from high air volume and an easy-to-read low-pressure gauge than from an extreme maximum-pressure rating. Check your tire and rim limits before inflating.
Can a regular floor pump inflate tubeless mountain bike tires?
It can inflate many tubeless tires once the bead is seated, but it may not provide enough initial airflow to seat every bead. A pump with a dedicated tubeless reservoir, a suitable compressor, or a bike shop may be needed.
Should I choose a Presta or Schrader floor pump?
Choose a pump head that matches the valves on your wheels. If you maintain bikes with both valve types, choose a head explicitly designed for both or keep the correct adapter available.