Pump Head Chewing Up a Presta Thread: Causes and Fixes
A pump head usually damages a Presta thread because it is being installed at an angle, tightened too far, or used with worn or mismatched hardware. Check the chuck, valve, and setup before replacing the pump.
Pump head chewing up a Presta thread
If a pump head is chewing up the threads on a Presta valve, stop forcing the connection. The most common causes are a chuck that is misaligned, a screw-on head tightened too aggressively, damaged pump-head threads, or a Presta valve that is already bent or poorly supported. Correcting the alignment and changing worn hardware can prevent repeated valve damage.
Check the pump head first
Remove the pump head and inspect its Presta opening in good light. Look for:
Cross-threaded, flattened, or sharp internal threads
A loose threaded insert
A lever or locking mechanism that does not move smoothly
Rubber seals that are split, swollen, or missing
A head designed for Schrader valves or a different valve system
A damaged chuck can cut into the valve even when you install it carefully. If the head catches immediately, feels gritty, or will not screw on straight, replace the chuck or pump head rather than continuing to use it.
Some pump heads use a screw-on connection, while others seal with a push-on fitting and locking lever. Do not add extra force to a lever-style head to compensate for a poor seal. The lever should lock with moderate hand pressure according to the pump maker’s instructions.
Make sure the valve is straight and supported
A Presta valve’s threaded stem is relatively narrow and can bend if the pump head pulls sideways. Before attaching the pump:
Remove the valve cap.
Loosen the small Presta tip nut only enough to allow air in.
Press the tip briefly to confirm the valve is not stuck.
Hold the valve stem near the rim with one hand.
Keep the pump head in line with the valve as you attach it.
Do not let the hose hang at an angle while the head is being installed. Support the head and hose so their weight is not bending the valve. If the valve stem moves noticeably in the rim or leans to one side, stop and inspect it before pumping.
A valve that is too short for the rim can also make attachment awkward. Deep-section rims may require a longer Presta valve or a suitable valve extender. The extender must match the valve design and should be installed according to its instructions.
Product prices and availability are accurate as of the date/time indicated and are subject to change. Any price and availability information displayed on Amazon.com at the time of purchase will apply to the purchase of this product.
Avoid cross-threading the chuck
For a screw-on Presta pump head, turn the head backward slowly until the threads drop into alignment, then turn it forward by hand. It should engage smoothly for several turns. If it starts at an angle, remove it and try again rather than tightening it into place.
The pump head only needs to seal against the valve. It does not need to be tightened as hard as possible. Excessive tightening can damage the valve threads, crush the chuck seal, and make removal more likely to bend the stem.
For a locking pump head, push it straight onto the valve before closing the lever. Avoid twisting the head while the lever is locked. If the head will not seat without force, check that it is set to Presta mode and that the internal seal has not shifted.
Check for a clogged or damaged valve
Dirt, dried sealant, or a damaged valve core can make the pump connection feel abnormal. With the tire deflated or at low pressure, inspect the exposed threads and valve tip. Wipe away loose dirt with a clean cloth.
Do not use pliers on the small Presta tip or valve stem. If the core is bent, the threads are visibly stripped, or the valve leaks around the stem, the inner tube or tubeless valve may need replacement. Tubeless valves also have a base seal and retaining nut that must remain properly seated against the rim.
If sealant has entered the valve, a compatible replacement valve core may solve the problem. Remove and install a core only with the proper small valve-core tool and only after confirming the valve uses a removable core.
Confirm the pump is compatible
A pump advertised as having a Presta connection should fit the valve without an adapter, but designs vary. Check the pump instructions for:
Presta, Schrader, or dual-valve compatibility
Screw-on versus locking attachment
Whether the head uses a removable insert
Whether an adapter is required
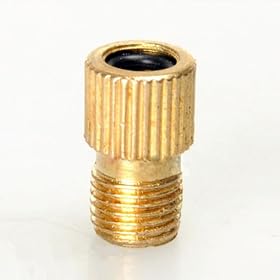
A Schrader-to-Presta adapter can be useful with a pump that has only a Schrader chuck, but it adds another threaded connection and can make alignment less convenient. Keep the adapter straight and do not use it as a reason to force a mismatched pump head onto the valve.
A pump head with a damaged or poorly fitting insert is usually a better replacement than repeatedly replacing tubes. If the pump is old and its hose, seals, and head are all deteriorated, replacing the entire pump may be more practical.
Release the pump head without damaging the valve
Before removing the head, stop pumping and release any pressure trapped in the hose if the pump has a release button or prescribed release step. Keep the valve supported and remove a screw-on head by turning it straight, without rocking it side to side.
For a lever head, unlock the lever fully before pulling the head away. Do not yank the hose. If the head is stuck, deflate the tire carefully and follow the pump manufacturer’s removal instructions rather than twisting the valve stem.
After removal, tighten the small Presta tip nut by hand and replace the valve cap. The cap helps keep dirt out, but it is not an air seal on a normal Presta valve.
When to replace the valve, pump head, or pump
Replace the tube or tubeless valve when the Presta threads are stripped, the stem is bent, the valve leaks, or the valve base has been damaged. A pump-head replacement is reasonable when the chuck threads, seal, lever, or internal insert are worn but the pump body and hose remain in good condition.
Replace the complete pump when replacement heads are unavailable, the hose is cracked, the handle or barrel is damaged, or the pump repeatedly misaligns with otherwise undamaged valves. Choose a head that clearly supports Presta valves and matches your normal tire pressure needs.
Do not continue pumping if the valve is bending, air is escaping around the rim, or the head is cutting into the stem. If a tubeless valve will not reseat or the rim interface appears damaged, have a qualified bike shop inspect it.
FAQ
Why does my pump head strip a Presta valve thread?
The usual causes are cross-threading, excessive tightening, a worn pump-head insert, or sideways force on the valve stem. Install the head straight, use only enough force to seal it, and replace damaged hardware.
Should a Presta pump head screw on all the way?
A screw-on head should engage smoothly and seal without excessive tightening. If it binds, starts at an angle, or requires force, remove it and inspect the chuck and valve threads.
Can I fix damaged Presta threads?
Minor dirt or a damaged removable valve core may be repairable, but stripped or badly bent valve-stem threads generally require replacing the inner tube or tubeless valve.
Is a Presta adapter safer than a direct Presta pump head?
An adapter can work safely when it fits correctly and is kept straight, but it adds another threaded connection. A properly fitting direct Presta head is usually simpler for regular use.